Steps
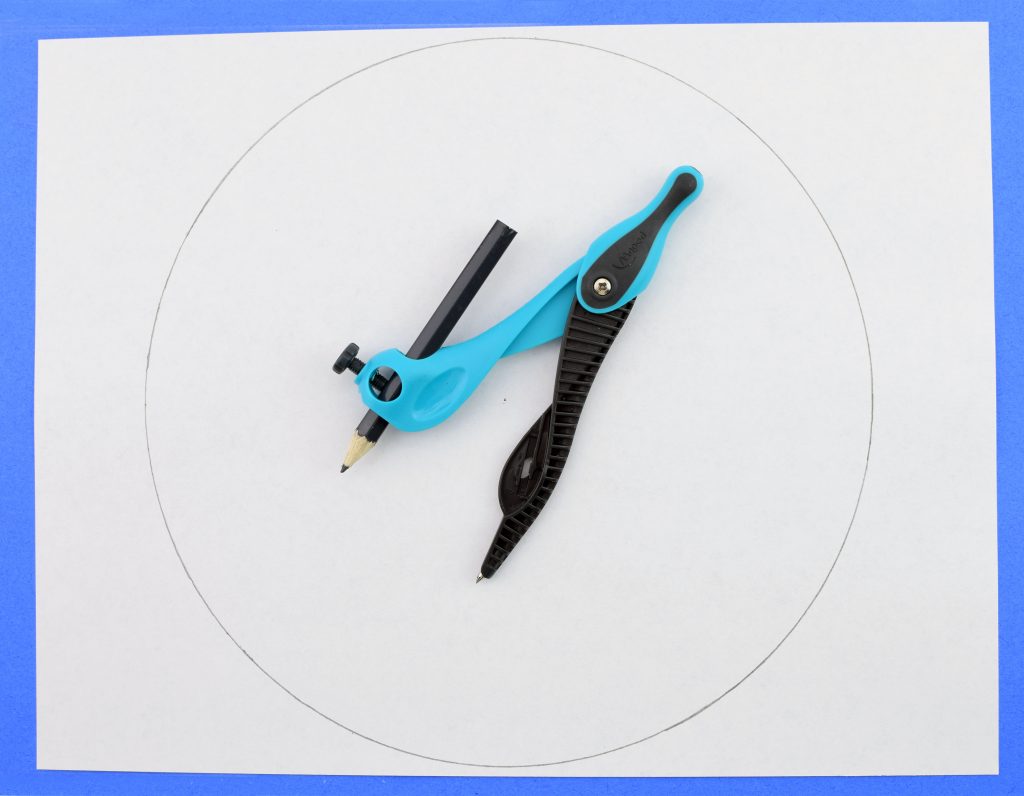
Step 1
Using a compass, draw the largest circle possible on your paper.
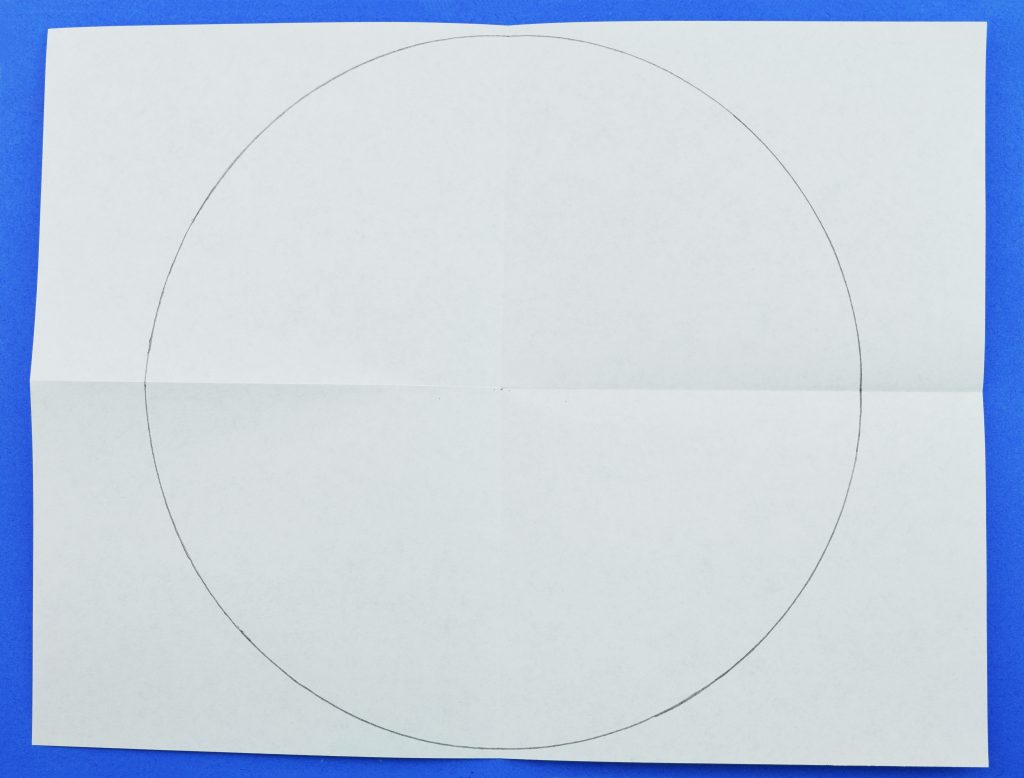
Step 2
Fold your paper in half twice, making sure the center point made from your compass is in the middle.
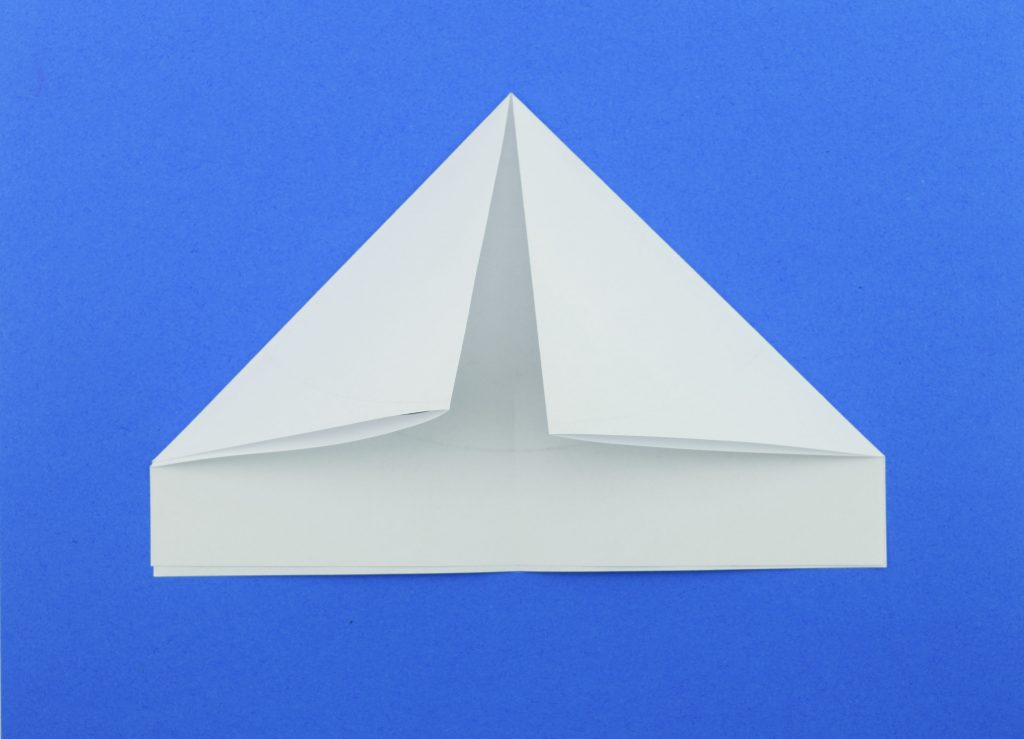
Step 3
Fold your paper twice inwards to create 8 equal sections in your circle.
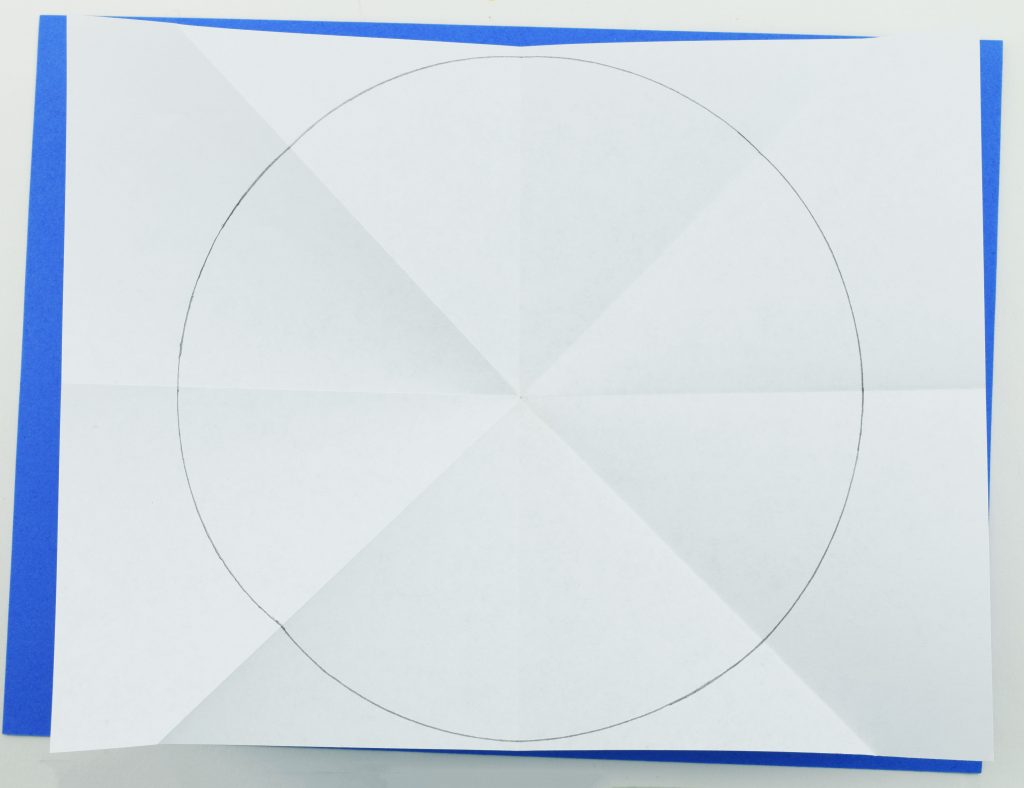
Step 4
When you open your paper up it should look like this.
Step 5
Using one of the sections, draw a design that you will replicate all around your circle. Make sure it is symmetrical.
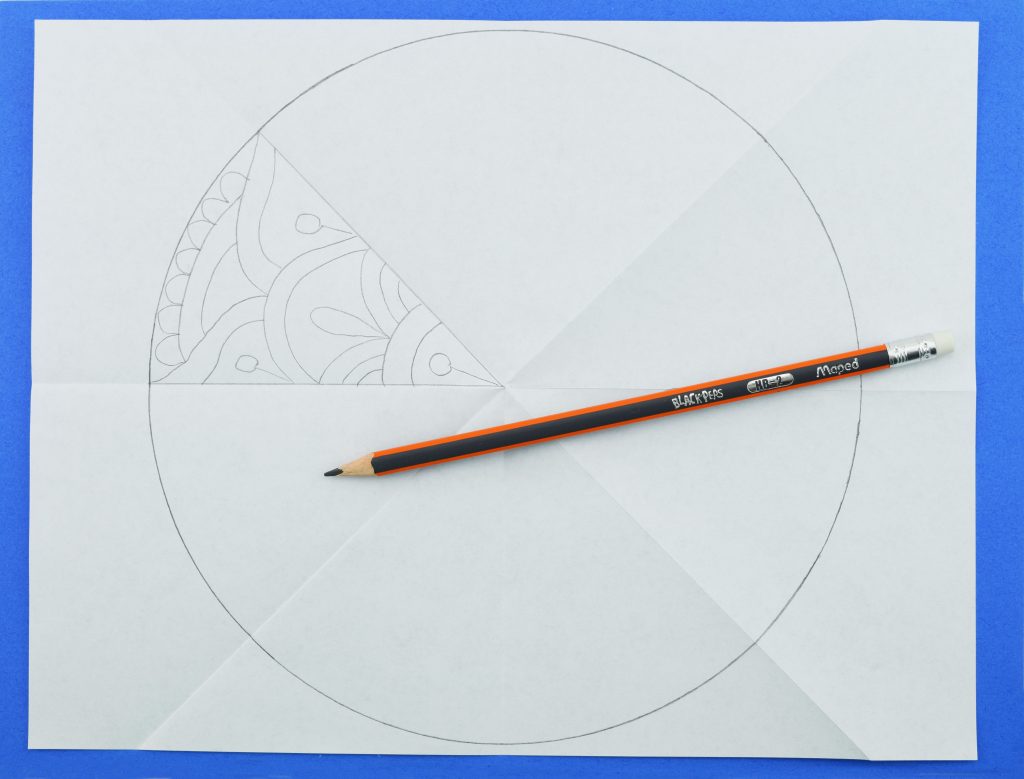
Step 6
If you don’t like your first design, use another blank space to draw another one.
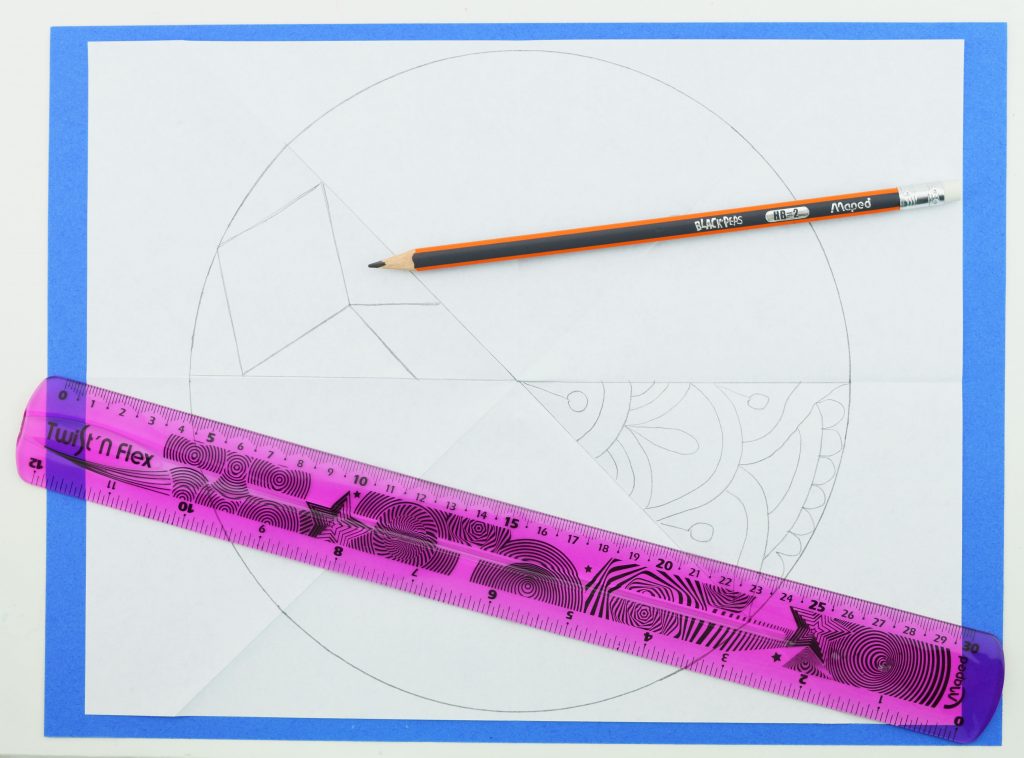
Step 7
Settle on one design and create a final draft for it using your marker. Below are some examples of designs you may use depending on how detailed you want to be.
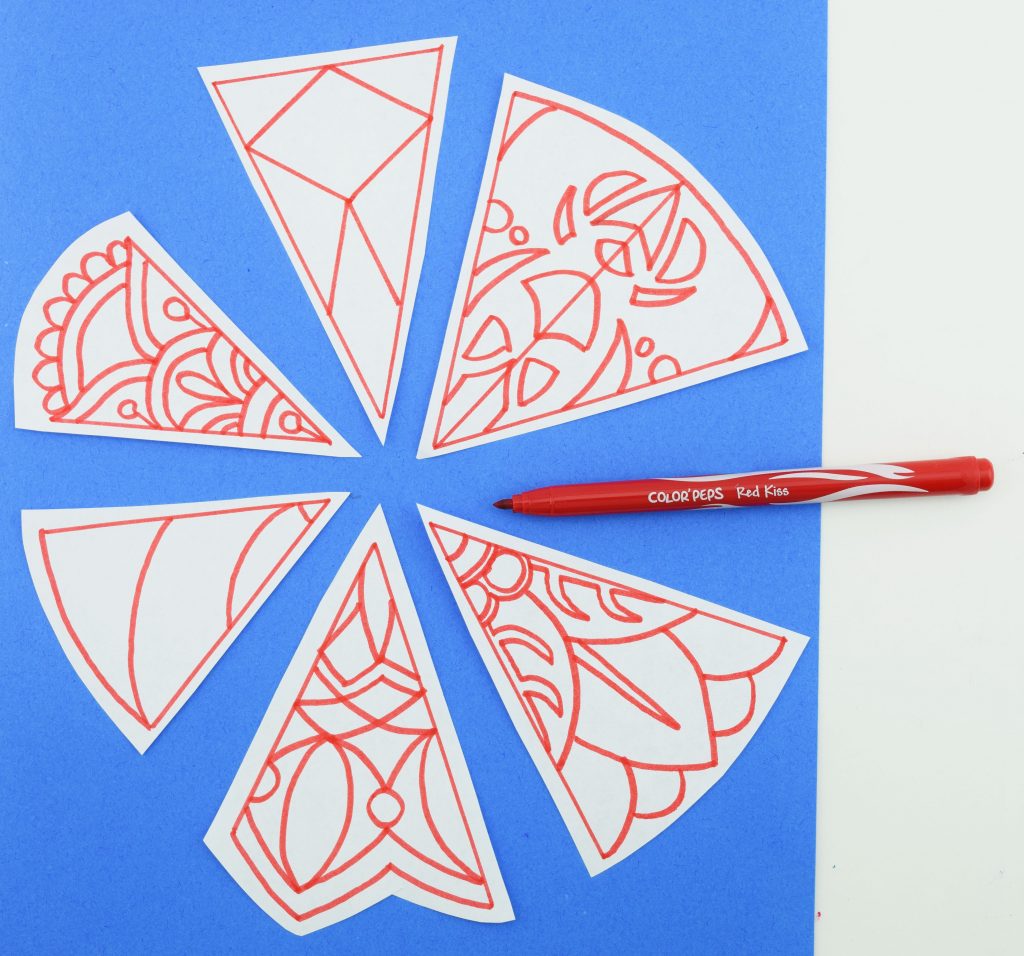
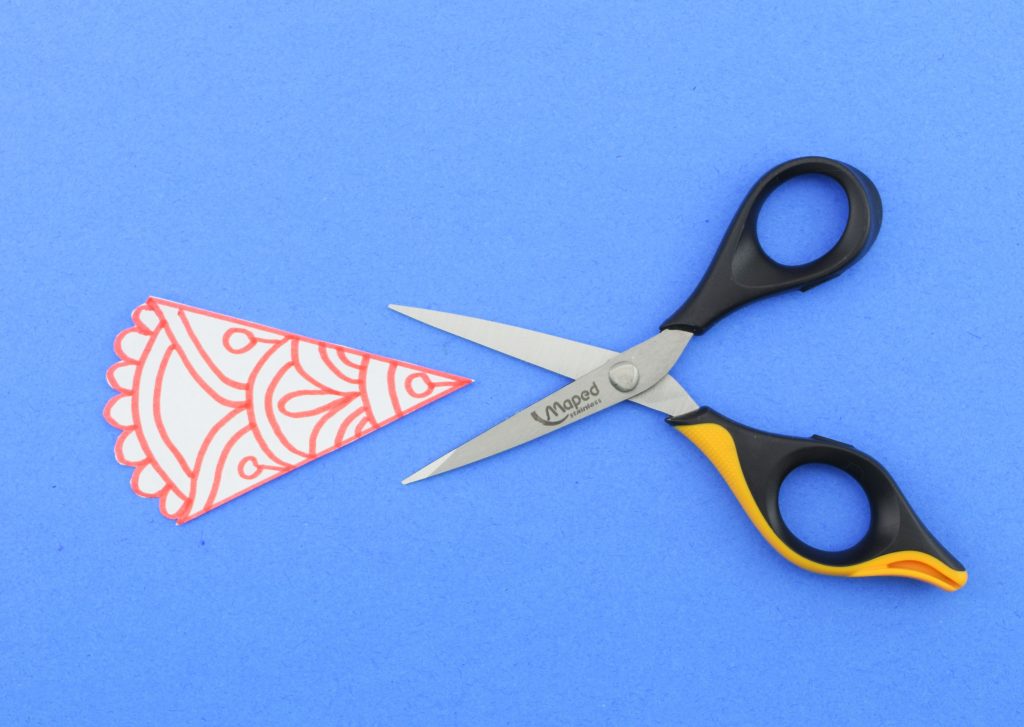
Step 8
Cut out your chosen design.
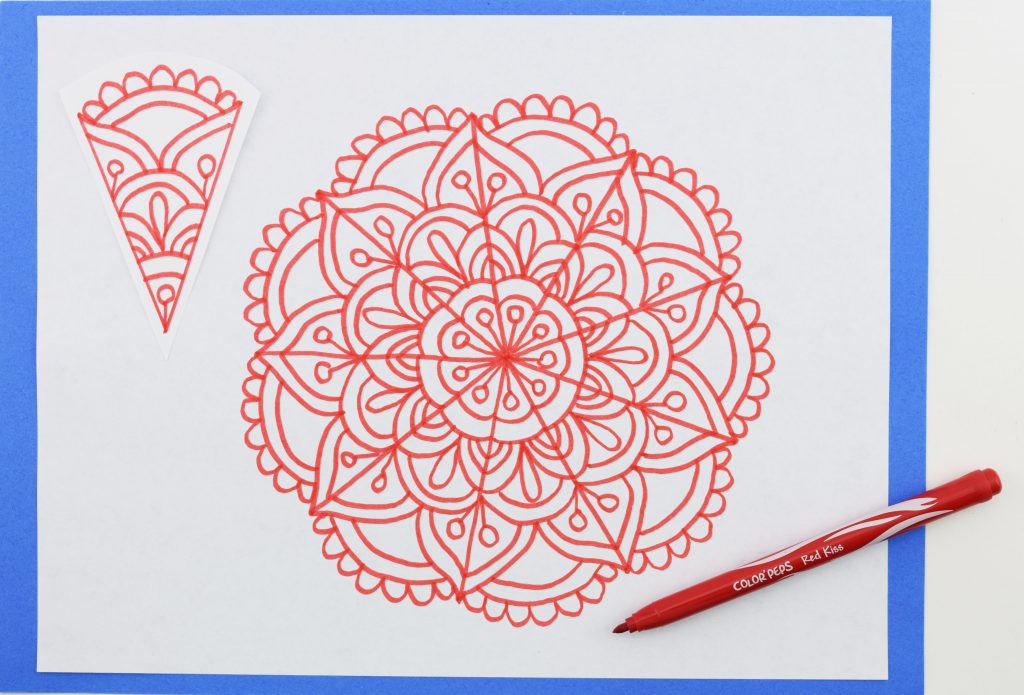
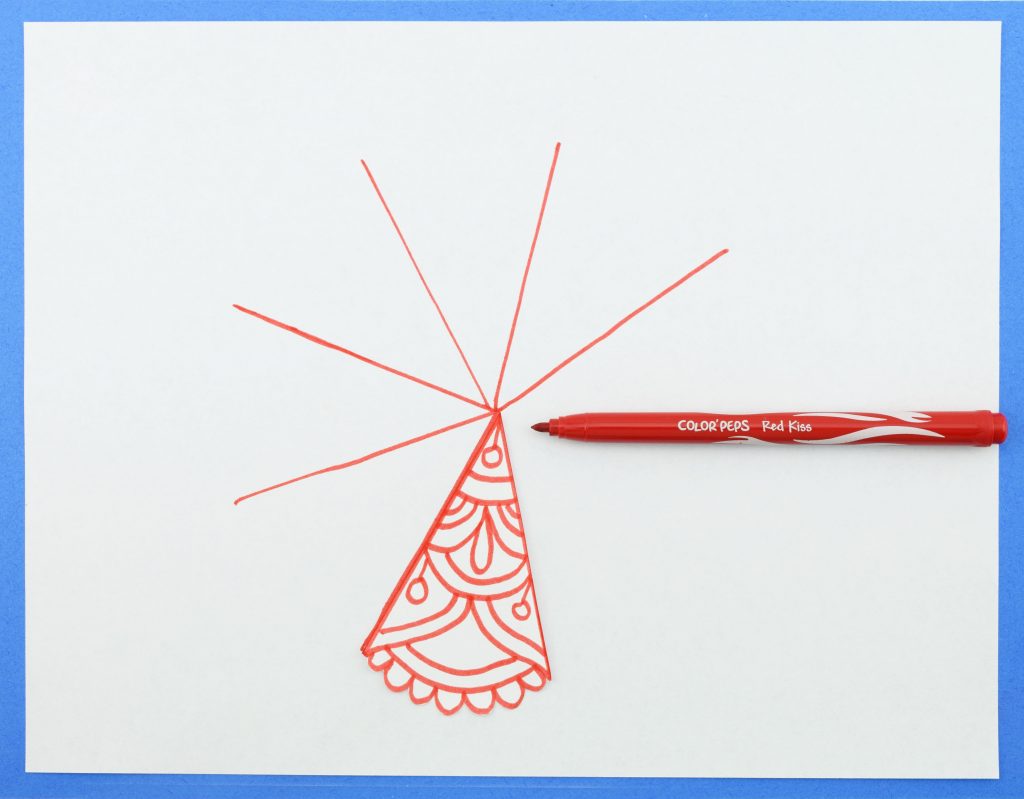
Step 9
Place your design on your final draft paper and mark the two sides with marker. Then rotate your design and mark the other side until you have completed the circle. You should end up with 8 symmetrical lines spiraling outwards.
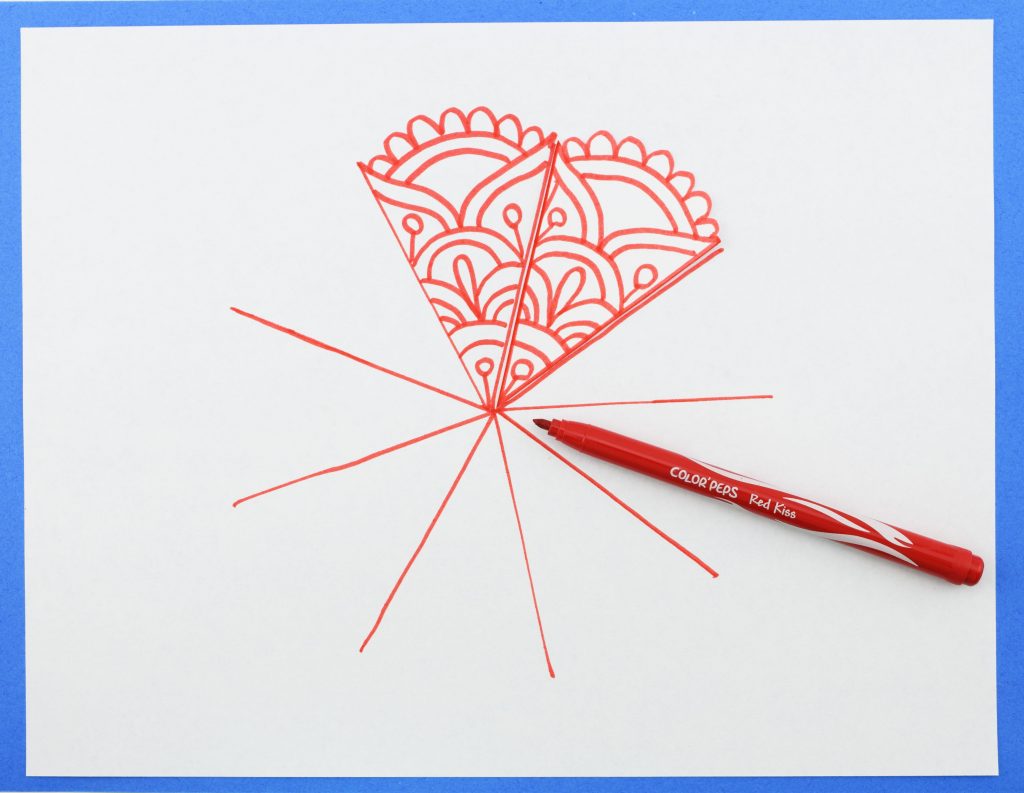
Step 10
Place your design in one of the white spaces and replicate in the space beside it.
Step 11
Repeat until all spaces are filled.
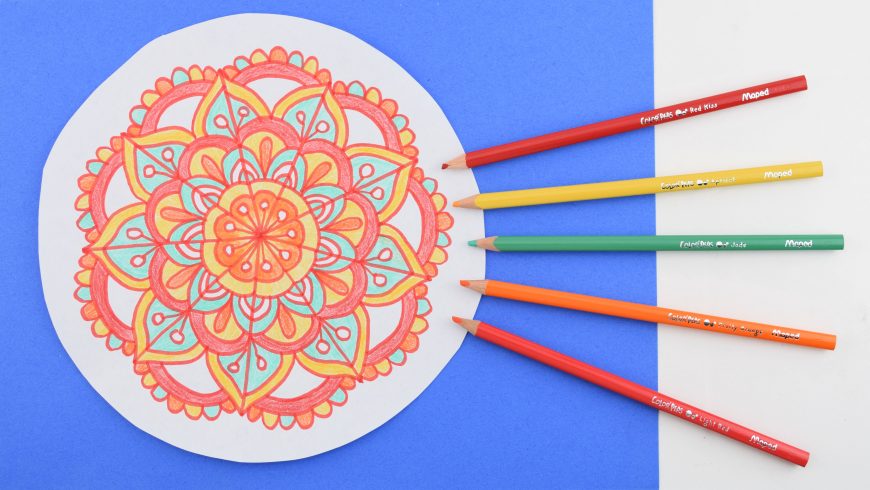
Step 12
Grab your color pencils and fill in the spaces you just created. Get creative and use two colors to fill one space!
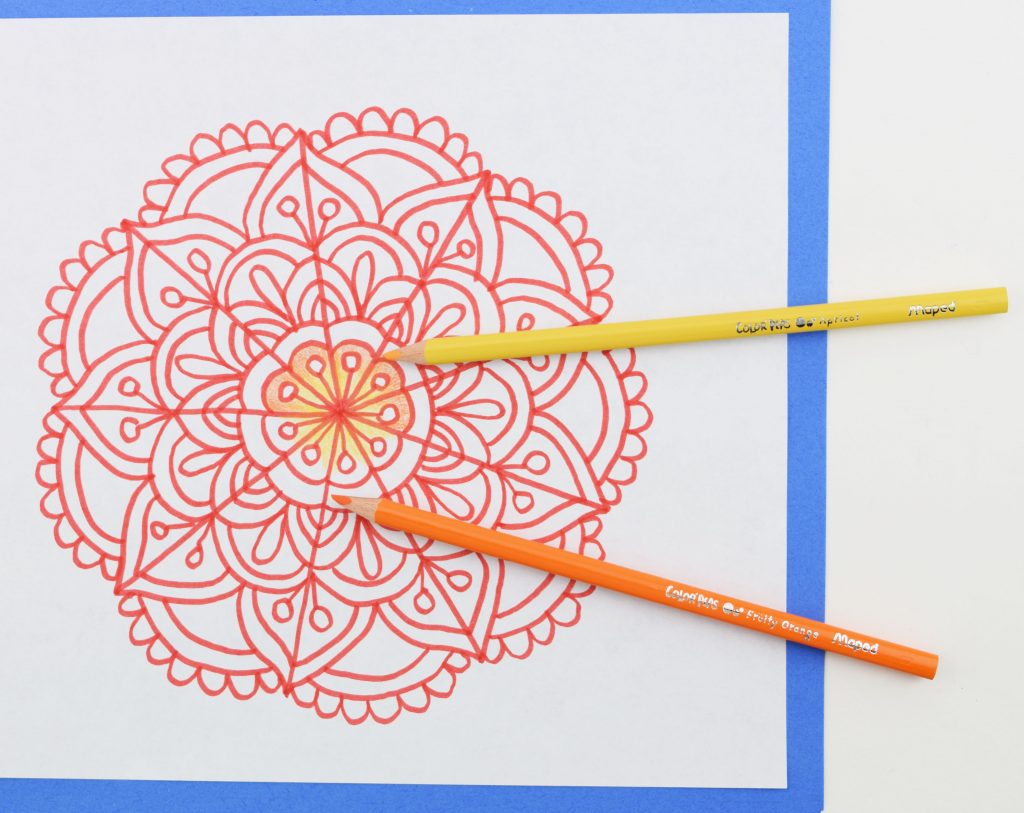
Step 13
Leave some white space to help accentuate your colors.
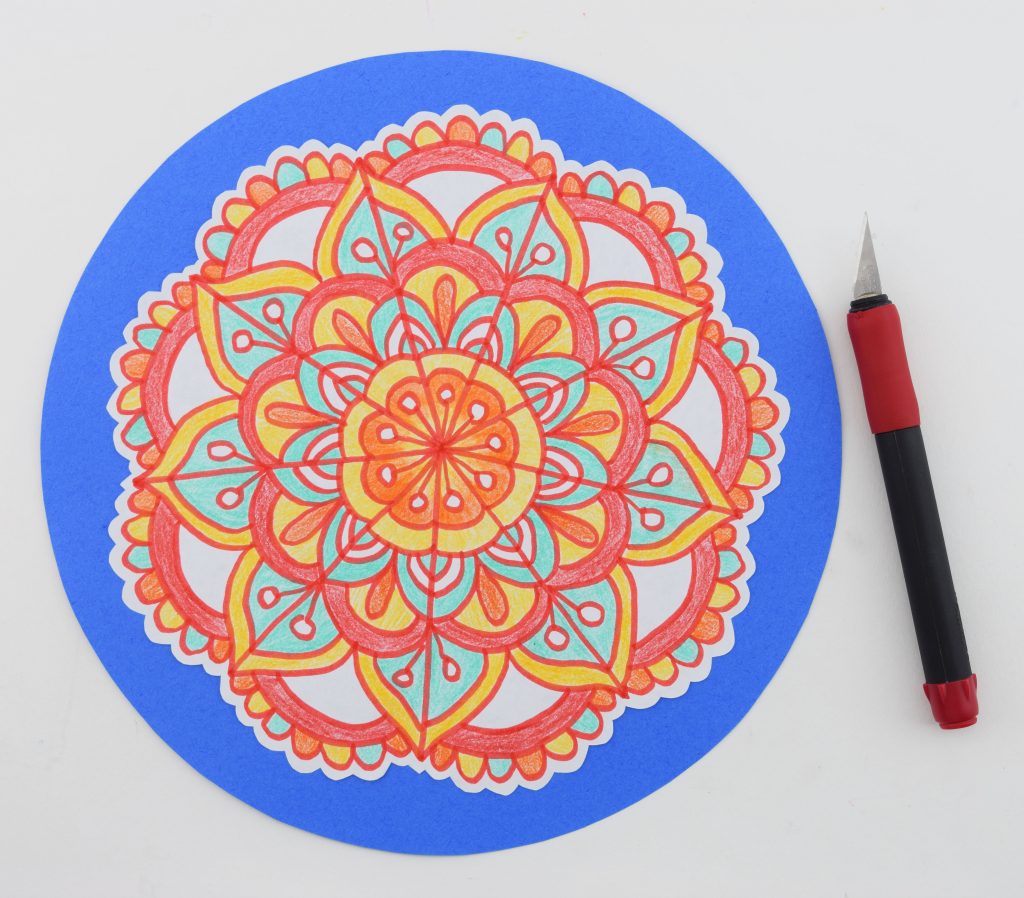
Step 14
You can use scissors or a craft knife for this. Cut out your finished mandala and glue it on a contrasting paper and hang up your finished masterpiece!